What is Roles Anywhere?
Roles Anywhere is a newly released AWS service that allows you to use your private key infrastructure (PKI) to generate temporary credentials for accessing IAM roles from outside of AWS.
You can use AWS Identity and Access Management Roles Anywhere to obtain temporary security credentials in IAM for workloads such as servers, containers, and applications that run outside of AWS. Your workloads can use the same IAM policies and IAM roles that you use with AWS applications to access AWS resources. Using IAM Roles Anywhere means you don't need to manage long-term credentials for workloads running outside of AWS.
By relying on your private Certificate Authority (CA), you can generate and revoke certificates for your workloads without having to use long-lived IAM keys. To get started, you can either choose to use the ACM Private Certificate Authority service offered to you by AWS (a fully managed certificate authority that provides PKI functionality) or generate your own CA.
Requirements
Your own Private Key Infrastructure
For the purposes of this post, I will be using cfssl, a tool created by CloudFlare to manage my private CA. Another alternative you can use for a more scalable solution is Vault PKI.

And to use the certificates generated by your private CA, you will need to use the credential helper tool that IAM Roles Anywhere provides.
Using ACM Private CA
Incase you would prefer to use the ACM Private CA service, you can follow the ACM Private Certificate Authority documentation to provision a private CA and generate and https://docs.aws.amazon.com/acm/latest/userguide/export-private.html your certificates.
This will mean you can skip the "Getting Started" section and head straight for the "Configuring Roles Anywhere" section. The only difference would be selecting the "AWS Certificate Manager Private CA" option for the Certificate authority source when prompted.
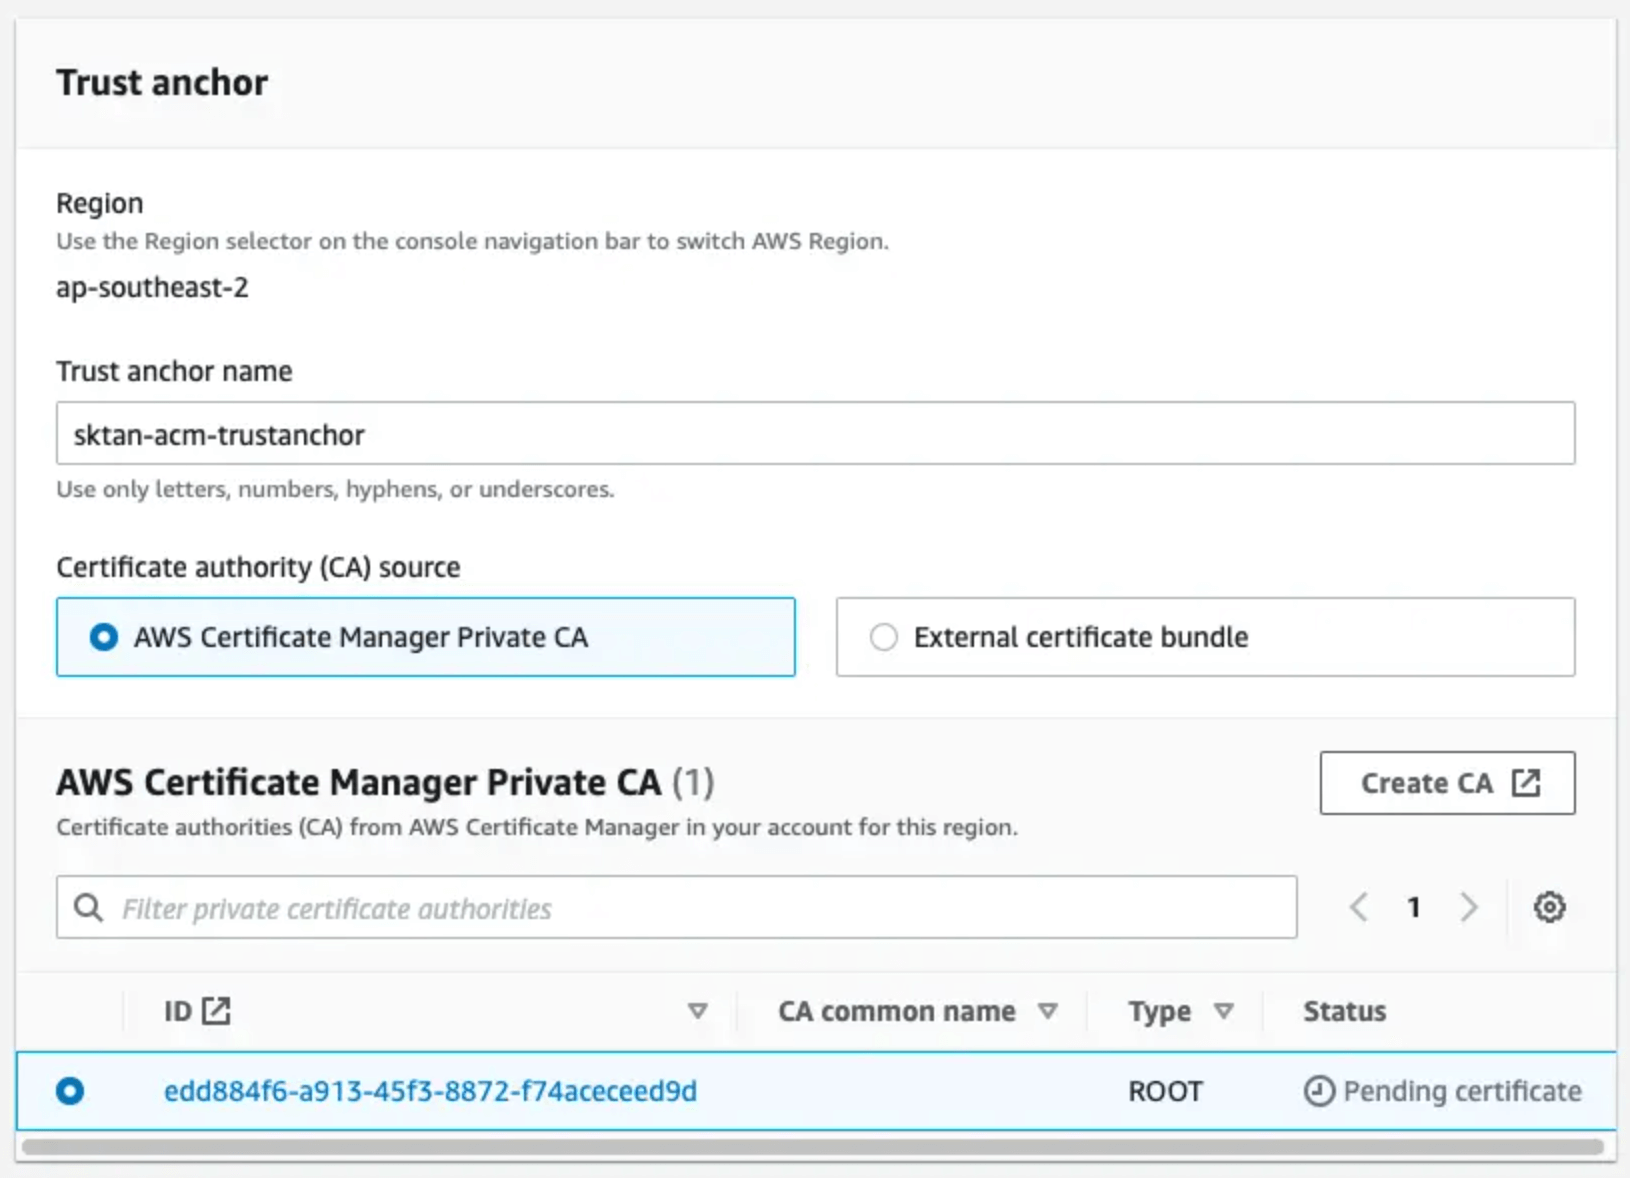
Make sure to enable the Certificate Revocation List (CRL) distribution feature, and specify an s3 bucket to place the CRL files.
If you are only looking to trial the service, please be mindful of your bill as creating a Private CA will give you a free 30 day trial and then cost $400/month afterwards per CA.
Getting Started
Once we have the cfssl tooling installed, we can look at creating our certificate authority.
To do this, you will need to create a directory to hold your private CA and inside, a ca-csr.json file to generate the certificate signing request. This is the example I am using for my certificate authority.
ca-csr.json
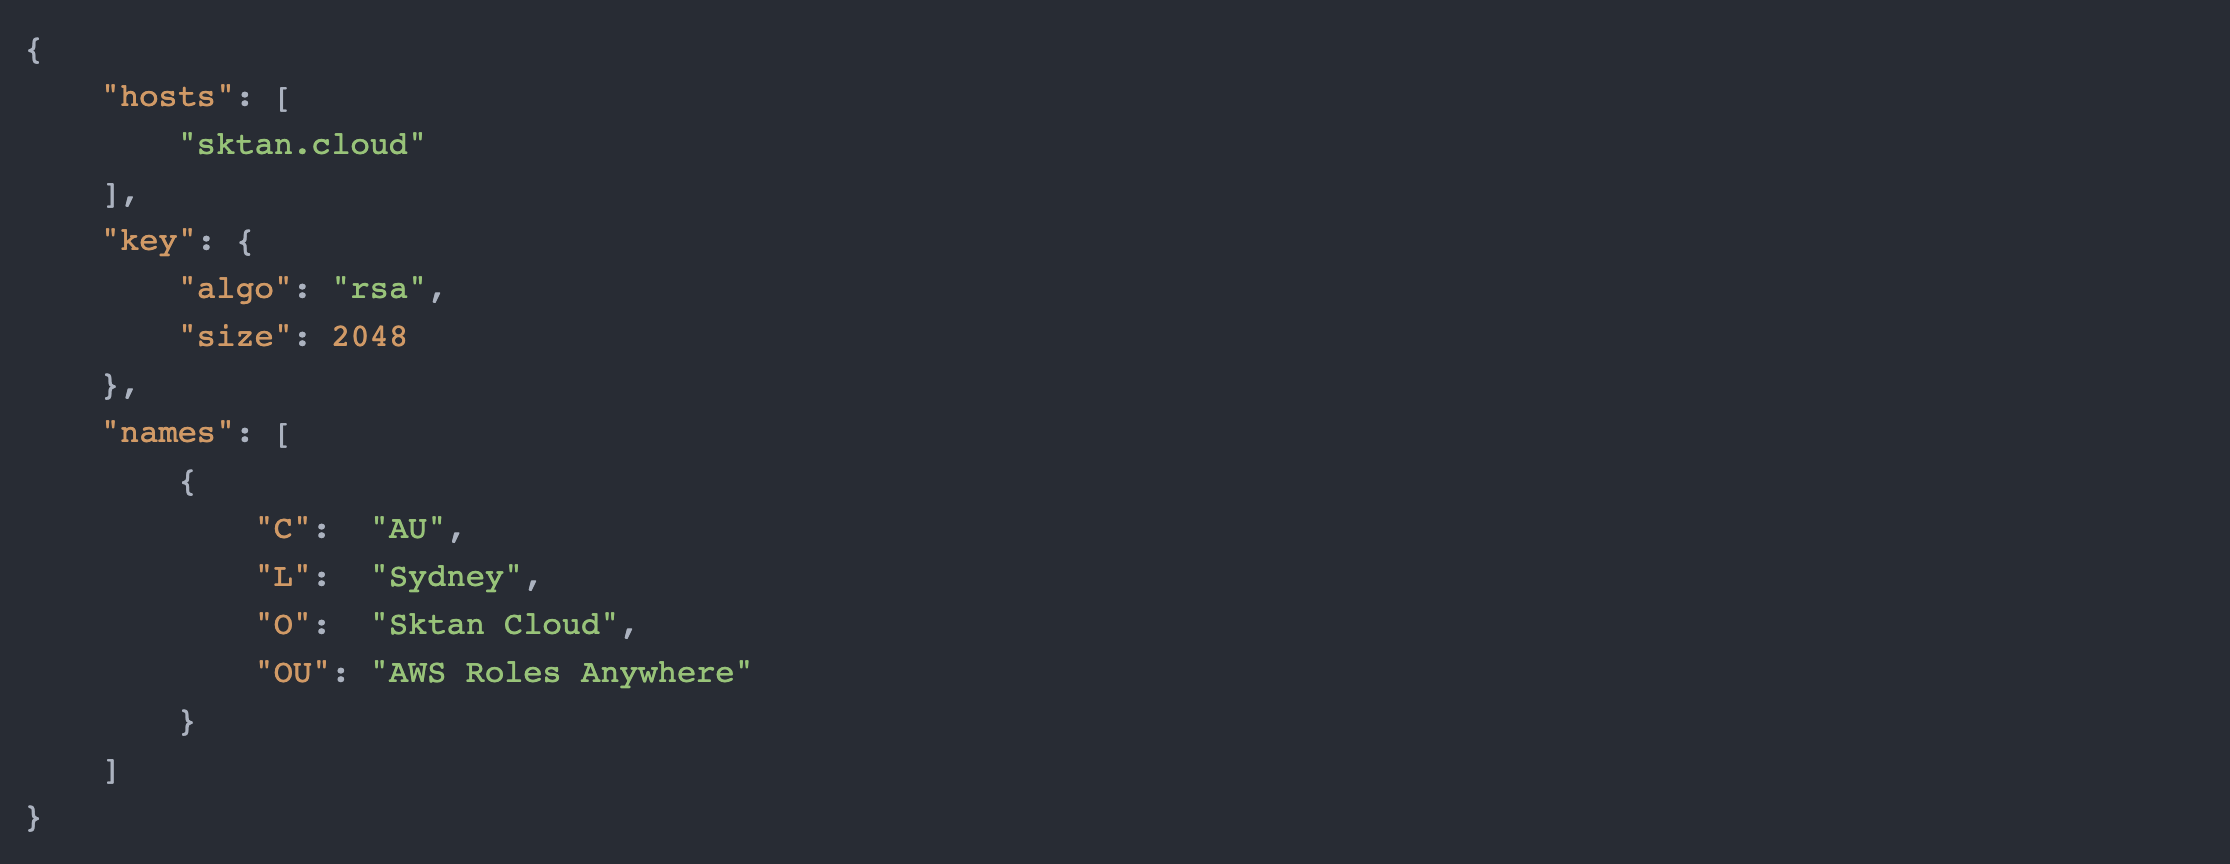
Using the contents JSON file shown above, we can now generate our CA:

Configuring Roles Anywhere
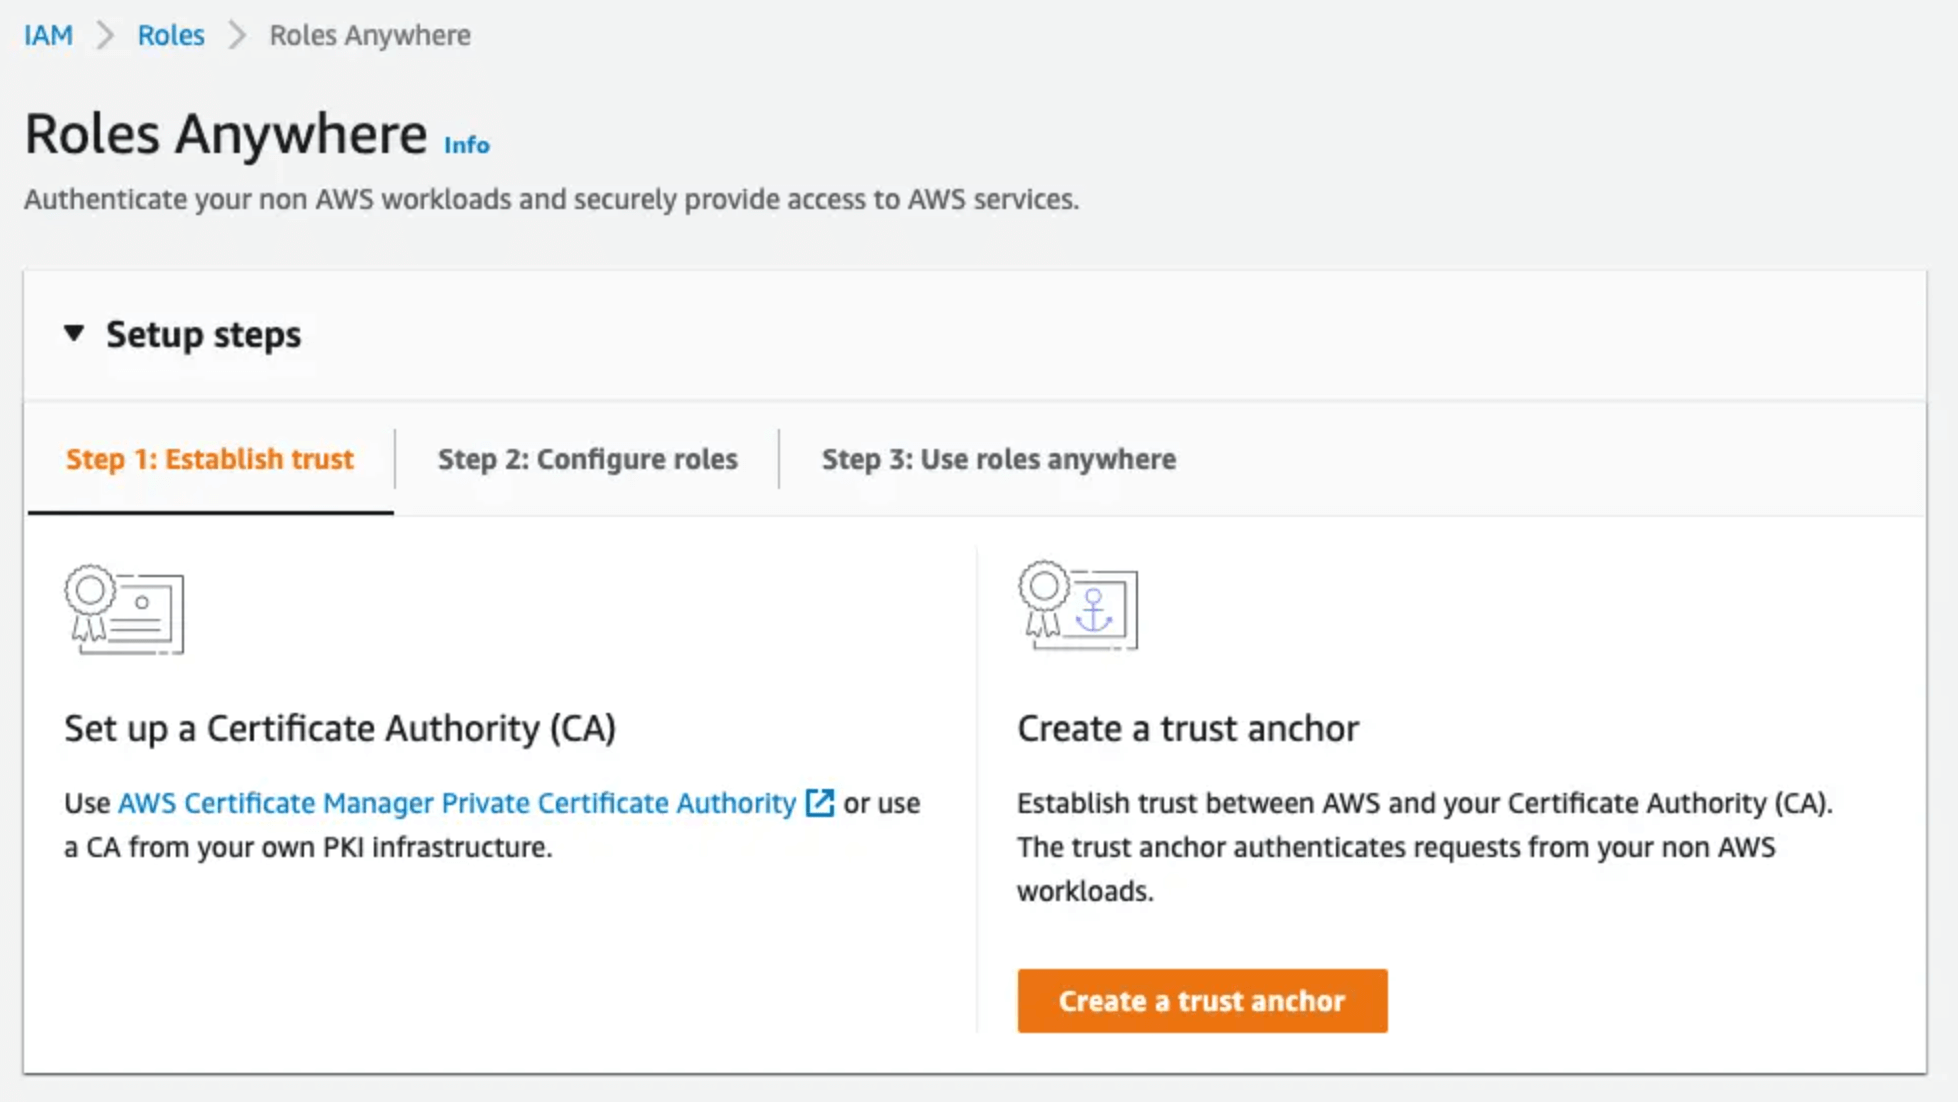
Once you have your CA files, we can start using this to configure our IAM Roles Anywhere trust anchor. The trust anchor establishes a trust between the IAM Roles Anywhere service and the CA that is used to sign the certificates.
Creating a Trust Anchor
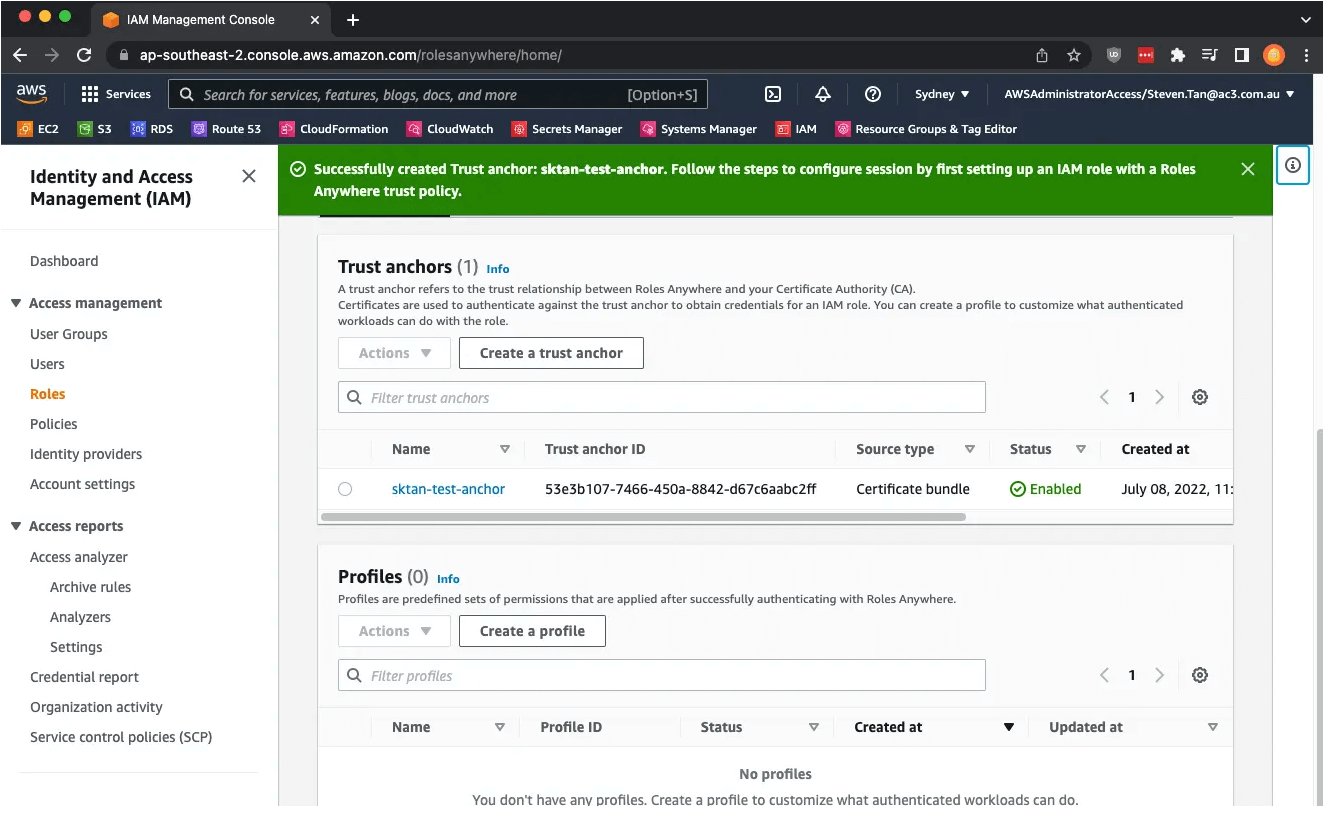
By browsing to the Roles Anywhere Page in the AWS Console, you can start to configure the trust anchor.
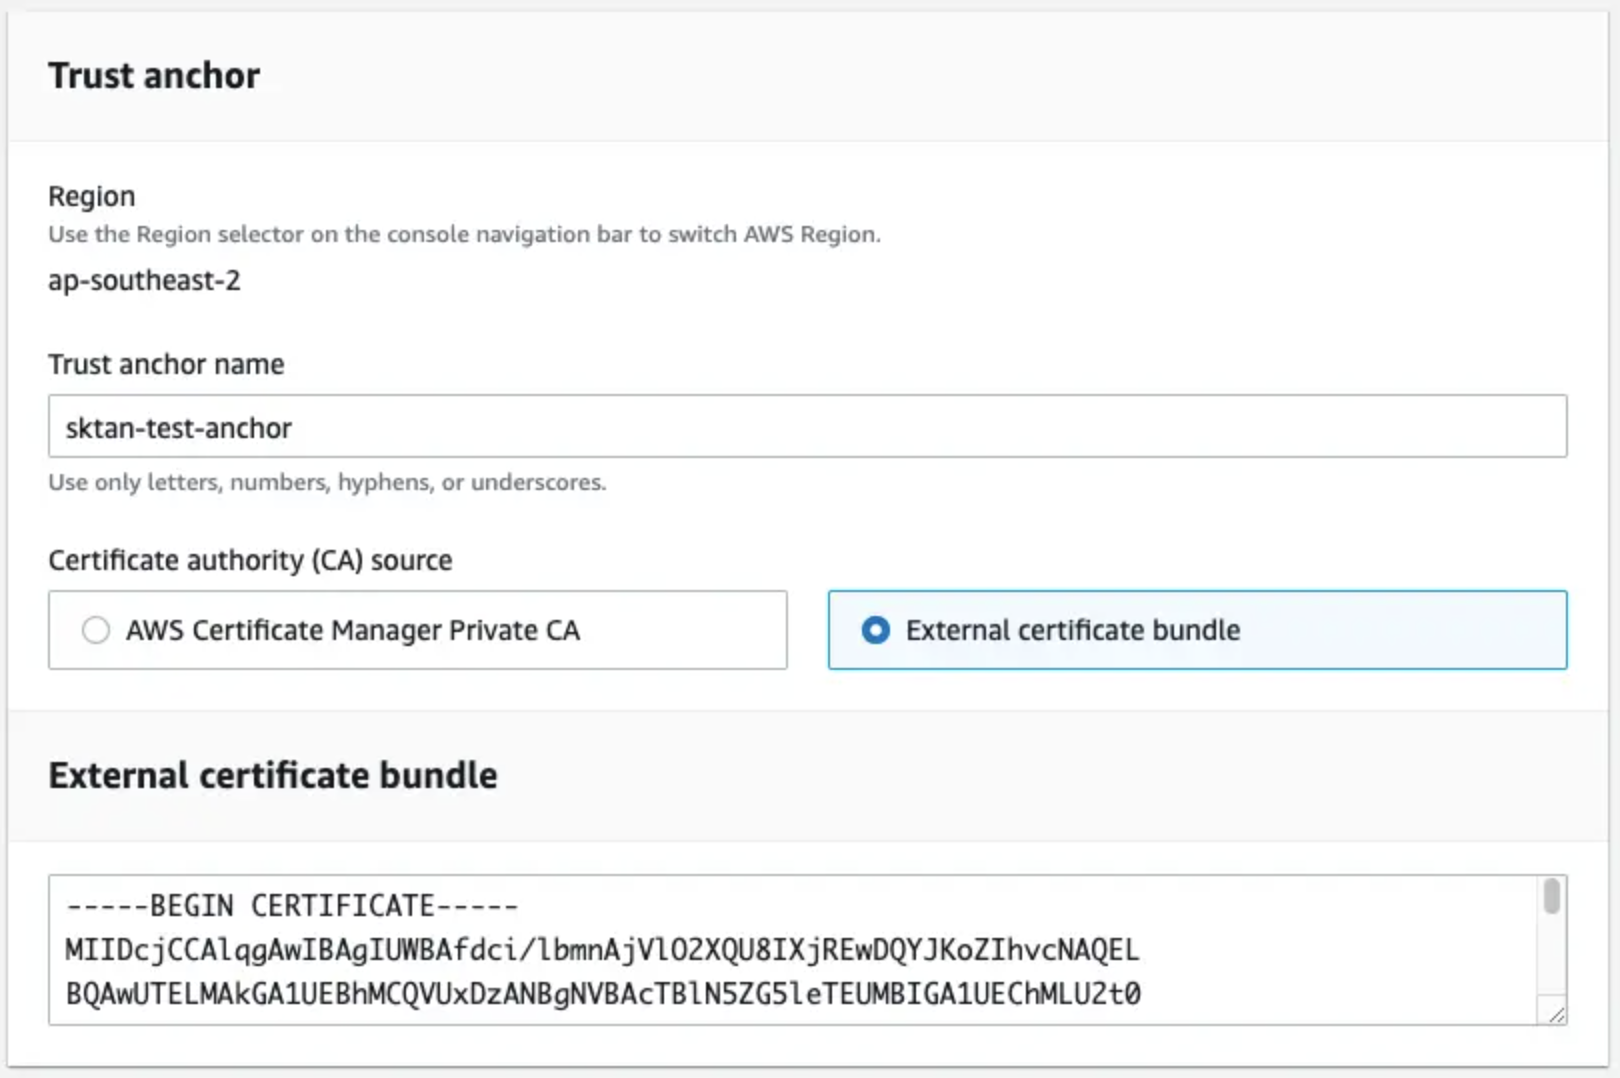
In the "Create a trust anchor" page, you can paste in the contents of your ca.pem file and click "Create trust anchor" and if the trust anchor is created successfully, you will see a message that says "Trust anchor created successfully".
Creating your Profile
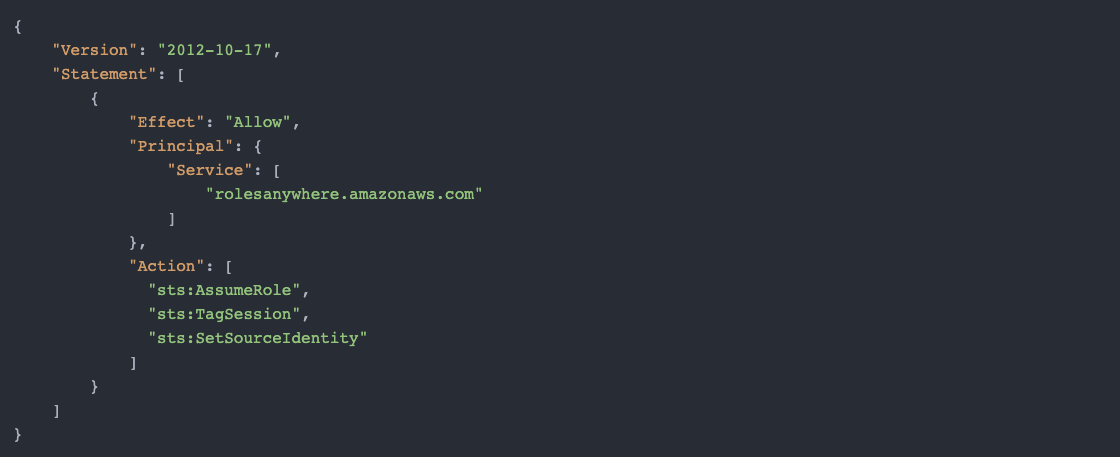
Prior to creating your profile, a role with a trust relationship with the IAM Roles Anywhere Service will need to be configured:
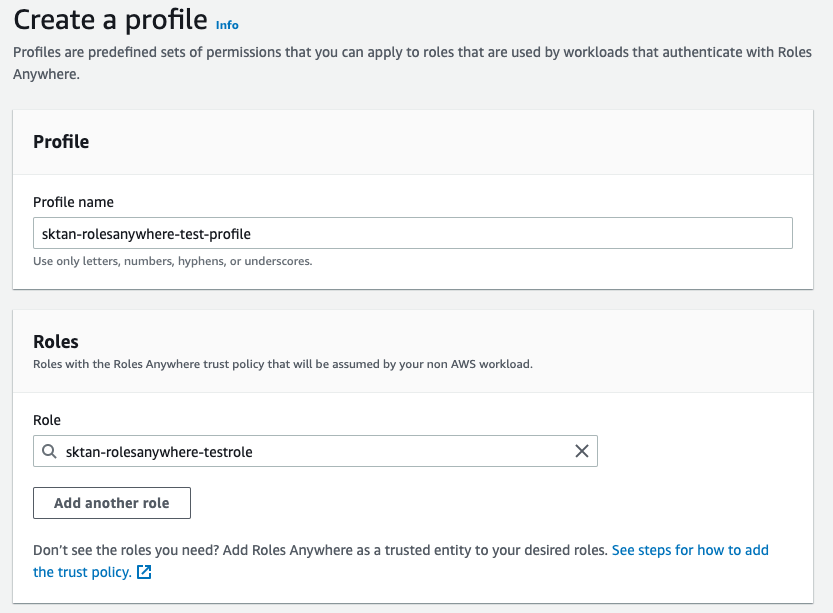
Once the trust anchor has been created and a role has been setup, you can create a profile for your workload. This will provide permissions to AWS services when using the temporary credentials generated by Roles Anywhere.
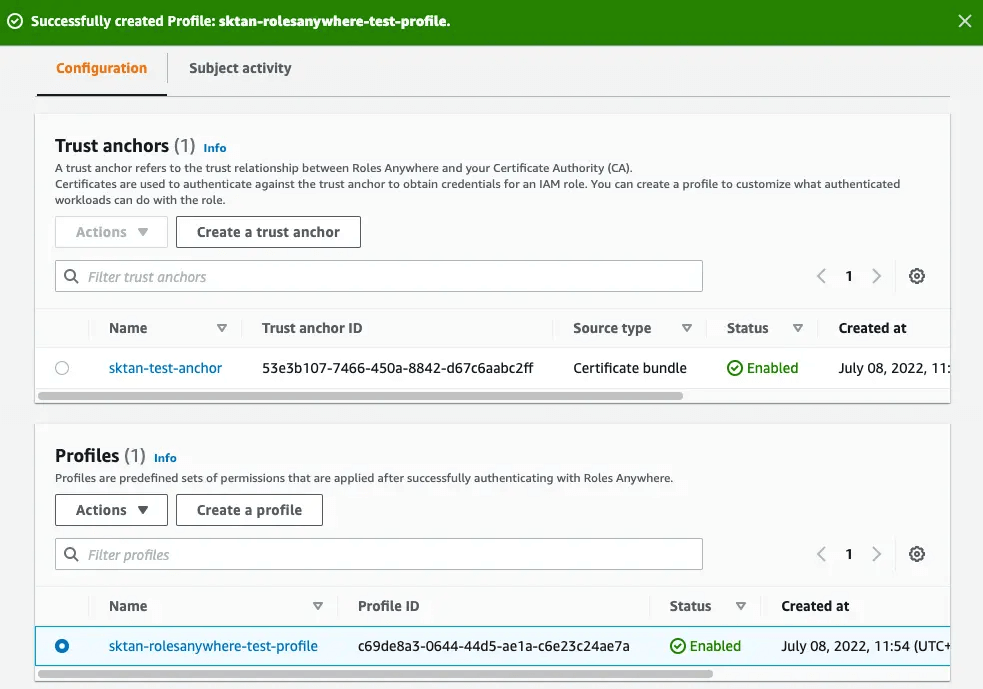
Roles Anywhere Configuration Completed
If all steps have been performed successfully, you should see this page pop up.
Creating a Workload Certificate (Own PKI)
Once the Roles Anywhere has been configured you will then be able to generate certificates for authentication.
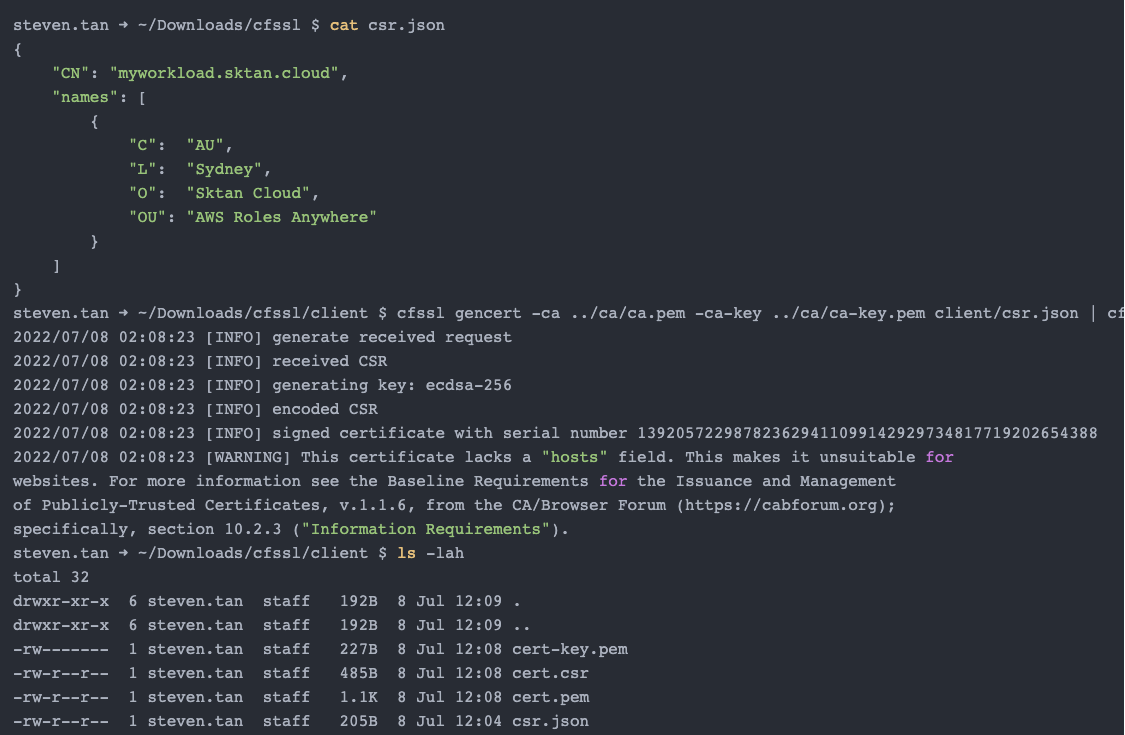
Let's use the cfssl tool to sign a certificate for my role:
Validating the Solution
To validate that this has all worked successfully, you can quickly by using the aws_signing_helper to generate temporary credentials. For this, you will need 3 ARNs and the paths to your workload certificate and private key:
- The ARN of your Roles Anywhere trust anchor
arn:aws:rolesanywhere:ap-southeast-2:01234567890:trust-anchor/abcd-efghi-jkl
- The ARN of your Roles Anywhere profile
arn:aws:rolesanywhere:ap-southeast-2:01234567890:profile/abcd-efghi-jkl
- The role ARN that you would like to use
arn:aws:iam::01234567890:role/sktan-rolesanywhere-testrole

If you successfully receive a response with the credentials, you can configure an AWS profile on the workload machine and run awscli commands to test the solution.

Revoking a Certificate
If you find yourself needing to revoke a certificate for any reason, IAM Role Anywhere supports the revocation of certificates by importing a CRL file in x509 format to the Roles Anywhere service. Though this means that the OCSP or CRL URLs provided in the certificate x509 extensions will not be checked automatically.
All generated CRL files must be imported into the Roles Anywhere service to be used, and then enabled.
ACM Private CA
To revoke a certificate, you will need to do it via the AWS CLI. Grab the Certificate Authority ARN and the certificate serial you wish to revoke, and run the following command:

Once you have revoked the certificate, you will be able to find the revoked certificates in the S3 bucket you specified as part of the ACM Private CA configuration:

Your own PKI
If you want to revoke a certificate, then you will need to use the gencrl command to create the CRL file:

Using the output above, we have verified that the certificate has been revoked both locally and using the remote CRL file.
Importing the CRL to Roles Anywhere
Once you have generated your CRL file, you can then import this into AWS. At the moment, this can only be done either programatically or via the CLI.
The CRL file must be in the x509 format which looks like this:

When downloading or generating a CRL file, you may notice that you get a binary file. This will need to be converted into the x509 format by base64 encoding the contents of the file and wrapping it with the "BEGIN" and "END" CRL lines:

Once you have a x509 format CRL file, it can be imported using the following commands:
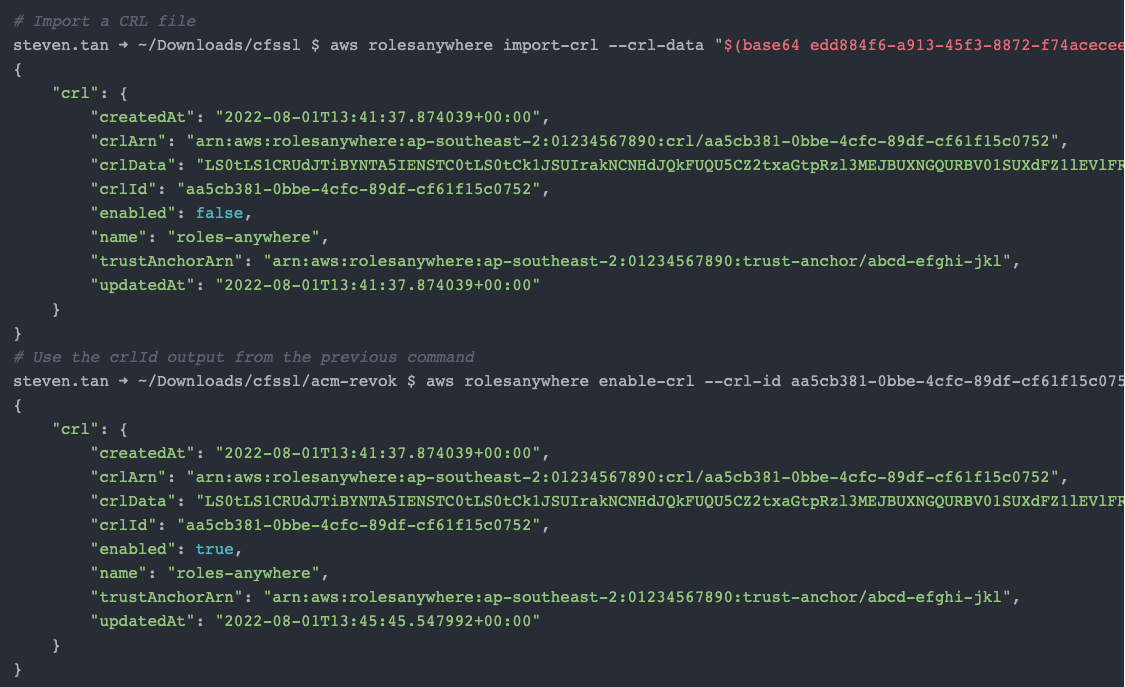
Once your CRL has been imported and enabled, you will find that attempting to authenticate via these certificates will no longer work.

